Aug 1, 2026
Product Photography Without a Studio: Pro Results with Window Light and Foam Board
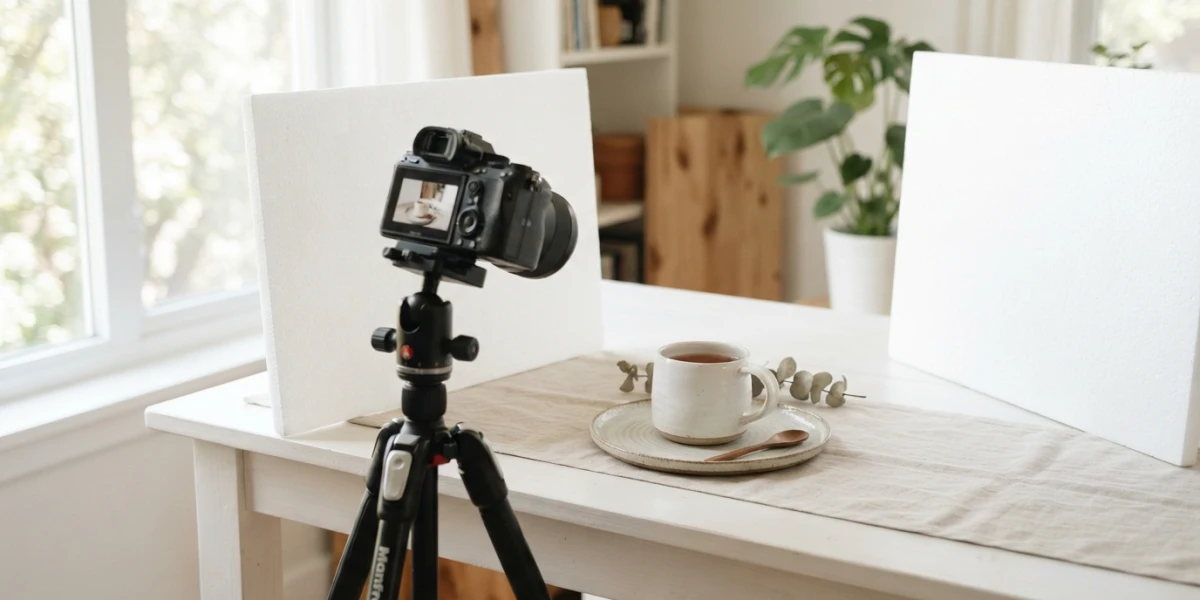
Image generated with AI
Professional product photography at home does not require a studio, a lighting kit, or a camera that costs more than the product itself. A window, a sheet of foam board, and the camera you already own are enough to produce shots that compete on ecommerce listings and stock marketplaces. Here is the full setup, from light to final file, with the technical standards buyers actually check.
Why Product Photos Decide the Sale
Shoppers cannot touch what they are buying, so the main image carries the entire burden of trust. A dirty background, flat light, or an out-of-focus product will kill conversion no matter how good the listing copy is — the eye makes the call in a fraction of a second and never looks back. This is why the largest marketplaces enforce strict technical rules rather than leaving image quality to taste.
Amazon, for example, requires the main image to sit on a pure white background (RGB 255,255,255), with the product occupying at least 85% of the frame and a minimum of 1,600 pixels on the longest side — 2,000 by 2,000 pixels is the recommended size. Listings that ignore the white-background rule risk being suppressed entirely. The same images you produce for a listing are also licensable as stock: white-background and lifestyle variants of the same product are among the most licensed categories in the industry, so one session can feed both your store and your portfolio.
The Window Is Your Studio
The most flattering light in your house is already there: the window. Place the product about a meter from it and let the light fall at roughly 45 degrees to the product, which models the shape without flattening it. On the opposite side, prop a white foam board as a reflector to fill the shadows — this one piece of cardboard does the work that a second studio light would do, bouncing soft light back into the dark side of the product.
Control of the light matters more than the equipment. An overcast day or an outdoor shadow acts as a natural diffuser, and the time of day changes the color of the light: mornings run cooler, late afternoons warmer. If the window light is too harsh, a sheer curtain or a sheet of baking paper taped over the glass softens it into a broad, even source. Once you learn to read the light through a window, you stop needing a strobe.
Build a DIY Lightbox in 10 Minutes
For small products, a lightbox gives you a controlled environment for the price of a cardboard box. Cut large openings in the left, right, and top panels of a box, line the inside with white paper bent into a smooth curve so there is no visible horizon line, and tape the paper only on the outside or back so the interior stays clean white. Light it with window light or a lamp diffused through white fabric, and you have a seamless background without buying anything.
The curved paper is the trick that makes the result look professional: it eliminates the corner where wall meets floor, which is the first thing that betrays a homemade setup. Keep the box small relative to the product so the light stays concentrated, and you will get the same soft gradient that studio product photographers chase with expensive softboxes.
Camera Settings That Keep It Sharp
Sharpness sells, and sharpness is a settings problem, not a gear problem. On any camera, close the aperture to f/8 or f/11 so the entire product is in focus, keep the ISO as low as the light allows, and put the camera on a tripod or a stable surface. Use the self-timer or a remote release so your finger never touches the camera during the exposure — vibration at slow shutter speeds is the most common cause of soft product photos.
With a phone, the same principles apply in touch form: tap the product to lock focus, drag the exposure slider down slightly to protect highlights, and use the 2x mode (roughly a 50mm equivalent) instead of the wide lens, which distorts edges and makes products look warped. A phone held steady on a stack of books beats a shaky DSLR every time.
The Marketplace White Background
When the listing requires a white background, be exact: RGB 255,255,255, the product filling at least 85% of the frame, and no hard shadows crossing the background. In post-production, lift the whites with a levels or curves adjustment rather than painting them out, and check the corners for gray cast. A quick white-balance pass on the raw file saves you from the yellow tint that window light can leave on the paper.
Styling: Surfaces and Props That Sell
The background is a selling tool. A reclaimed wood board, a marble-look contact paper, or a piece of linen gives the product context and a sense of quality that plain white cannot, and it is what turns a documentation shot into a photograph. Choose textures that support the product rather than compete with it, and keep props minimal: the fewer elements in the frame, the more versatile the image is for a stock buyer who needs to drop it into their own design.
For stock, shoot both variants — the clean white-background version for buyers who need a cutout, and the styled lifestyle version for buyers who need atmosphere. The two images serve different searches, and publishing both doubles your chances of a license.
From Product Shot to Stock Portfolio
When you upload the results, the keywords are what connect your image to a buyer. Describe the material, the use, and the lifestyle rather than the brand: "ceramic mug on wooden table, morning coffee, minimal" will be found; "my mug" will not. Avoid visible logos and trademarks unless you have property releases, and be honest about what the image contains so the license stays clean for commercial buyers.
The technical bar is not as high as the marketplaces make it seem. Meet the white-background standard for listings, keep the focus sharp, and light with intention, and your photos will sit comfortably next to work shot in expensive studios — because buyers judge the image, not the room it was made in.
Conclusion
You already own everything you need for product photography that sells: a window for light, foam board for fill, and a camera that fits in your pocket. The discipline is in the details — the 45-degree light, the curved paper, the locked focus, the exact white background — and those details cost nothing to learn. Shoot your first session this week, check the result against the marketplace standards above, and you will see the gap between your photos and studio work shrink to a matter of practice.
Need references for natural light and product styling? Browse the YourPhotoStock collection and study how professional product and lifestyle shots handle window light, surfaces, and negative space — then recreate those choices with the gear you have.
Related articles



Looking for the perfect stock photo?
Browse thousands of premium photos and 4K videos, pay per download.
Browse the collection